Plug-in solar
Plug-In Solar Balcony Mount: How to Fix a Panel to a Railing
Mount plug-in solar on a balcony railing with the kit's own brackets, rated for UK wind loads at your height. Railing checks, step-by-step fitting and limits.
Key facts
- Every compliant UK kit must include a mounting system with a structural analysis for UK wind and snow loads.
- Mounting that relies only on cable ties, rope, string, tape, bungee cords or straps is not permitted by the specification.
- Instructions must state the maximum installation height and the permitted mounting types, such as attachment to a balcony railing.
- Plug-in solar may not be installed on timber balconies or on timber, ACM, MCM or HPL cladding.
- A typical 450 W glass panel measures about 1.7 by 1.1 metres and weighs about 20 to 25 kg.
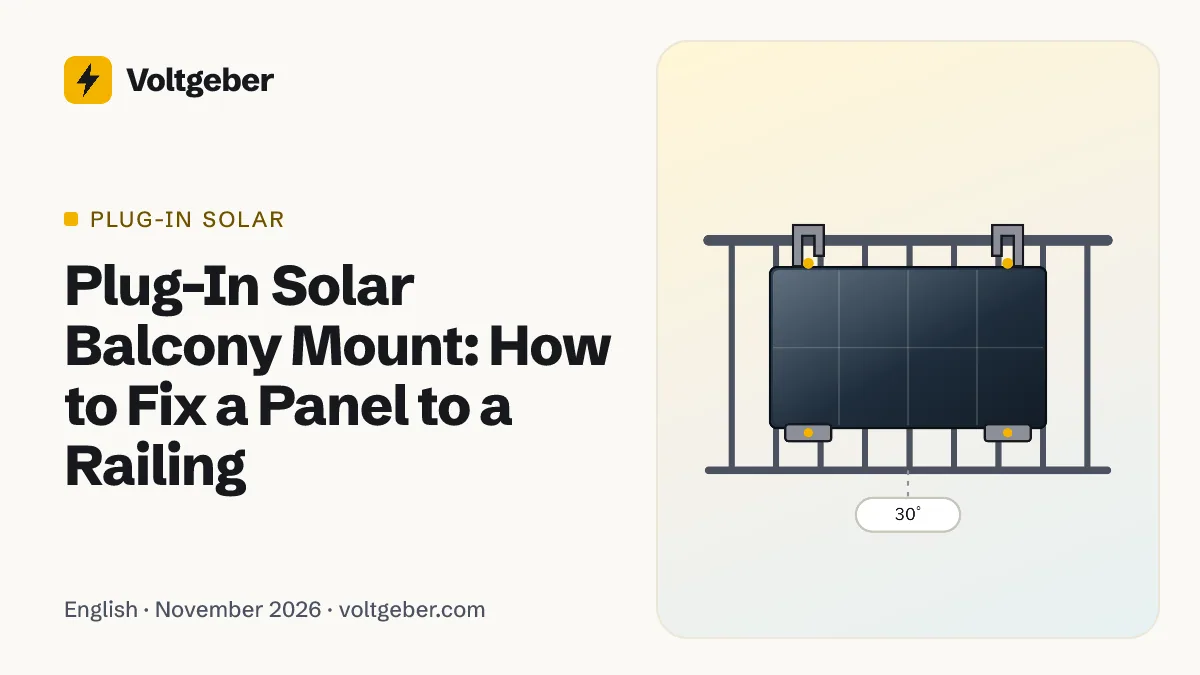
To mount plug-in solar on a balcony railing, use the brackets supplied with the kit, on a railing type and at a height the instructions permit. Every compliant UK kit must include a mount calculated for British wind and snow loads; cable ties and straps are not allowed as the fixing. The railing must be sound metal, the balcony not timber, and renters and flat owners need consent first.
What the rules require of the mount
The government’s Interim Product Specification, which every kit sold in Great Britain must meet since 27 August 2026, treats the mount as part of the product, not an accessory. The manufacturer must:
| Requirement | What it means for you |
|---|---|
| Supply a mounting system with the kit | You should not need to buy brackets separately for a permitted mounting type |
| Provide a structural analysis for UK wind and snow loads | The mount is calculated for British conditions, to the Eurocode wind and snow standards and their UK annexes |
| State the permitted mounting configurations | The instructions list where it may go, for example a balcony railing, a wall or a roof, and where it may not |
| State maximum installation heights | Higher floors see stronger wind; a kit may be permitted on a first-floor railing but not a tenth |
| Specify clearances and ventilation | Minimum gaps behind and around the panel, and a required angle if needed |
| Use corrosion-resistant materials | With isolating washers where different metals meet, and a statement if unsuitable for coastal or other corrosive locations |
| Make fixings reversible and non-permanent | They must not compromise the building’s structure, fire performance or weatherproofing |
| Ban improvised fixings | Mounting that relies solely on cable ties, rope, string, adhesive tape, bungee cords or straps is not permitted |
The specification also says the mount should minimise reliance on user behaviour for safety. In plain terms: if the instructions do not cover your railing, height or angle, the kit is not approved for that position.
Check the railing and the balcony first
-
Material. Steel or aluminium railings with a solid top rail are what most railing brackets are designed for. Timber balconies are banned outright. Glass balustrades are only suitable if the instructions list them.
-
Condition. Look for rust at the fixings, loose posts and cracked concrete where the railing is anchored. A railing that moves when you push it firmly is not ready for 25 kg of panel and the wind behind it.
-
Profile. Measure the top rail (round or rectangular, and its diameter or width) and the spacing between vertical bars or lower rails. Compare them with the clamp range in the instructions.
-
Height and exposure. Note which floor you are on and whether the balcony faces open ground or the sea, then check the kit’s maximum installation height and any corrosion warnings.
-
The surroundings. The specification bans installation on timber cladding and on aluminium composite (ACM), metal composite (MCM) or high-pressure laminate (HPL) cladding, and on buildings undergoing external wall remediation. Ask the building owner if you are unsure what the walls are made of.
If you live in a flat, the railing usually belongs to the freeholder, so consent comes before any of this; see plug-in solar in a flat. Renters need the landlord’s agreement; see plug-in solar for renters.
Bracket types
| Bracket type | How it works | Suits | Watch out for |
|---|---|---|---|
| Fixed railing clamps | Clamps or U-bolts hold the panel flat against the railing | Vertical mounting on south-facing railings | Lowest output on east or west railings |
| Tilting railing brackets | Arms hold the bottom of the panel against the railing and push the top outwards | Gaining output by tilting away from vertical | Higher wind load; projection limits in England |
| Hook-over brackets | Hooks over the top rail, secured with clamps | Railings with a wide, solid top rail | Must be clamped, never just hung |
| Floor stands on the balcony | A tilted frame stands on the balcony floor, sometimes ballasted | Balconies with deep floors and low railings | Must not block the door, escape route or drainage |
| Wall brackets | Fixed to the wall beside or below the balcony | Houses with a sunny wall | Drilling the wall needs owner consent; no fixing to a wall between two homes |
Tilting adds output: in a London model, a south-facing panel moved from vertical to 70 degrees produced about a quarter more over the year. See the best direction and angle in the UK.
Inside or outside the railing
Outside catches more sun over the top of a solid balustrade and leaves the balcony free. It also means the panel hangs over the street or garden below, so a dropped bolt or a panel lost in a storm falls on someone else’s space. In England, panels on a house balcony may project up to 0.4 metres from it, or 0.2 metres where the balcony abuts a highway, under permitted development; blocks of flats have their own limits. See planning permission for plug-in solar.
Inside is easier to fit and maintain and keeps everything over your own floor, but the railing shades the lower part of the panel unless it is open bars, and the panel takes up balcony space.
Follow whichever positions the instructions permit; some mounts are calculated for one only.
Fitting the panel, step by step
-
Read the instructions in full. Note the permitted railing types, maximum height, tightening torques, clearances and the order of assembly.
-
Check permissions and the socket. Consent from the freeholder or landlord if needed, and a suitable wall socket indoors or a weatherproof outdoor socket fitted by an electrician. Plan the cable route before you lift anything.
-
Assemble the brackets on the panel indoors or on the balcony floor. Lay the panel face down on a blanket and fit the bracket parts to the frame holes the manufacturer specifies. Never drill the panel frame.
-
Lift with two people. One holds the panel; the other fits the clamps. Work on a calm, dry day, and keep loose parts in a box rather than on the railing.
-
Clamp to the top rail and a lower rail. Use every clamp supplied, positioned as the instructions show, and tighten to the stated torque. Check the panel cannot slide or lift.
-
Fit the microinverter where the instructions say. Often on the mount behind the panel, sometimes indoors. Keep it out of standing water and direct rain if it is not rated for that.
-
Connect the DC side with the AC plug out. Click the panel connectors into the inverter. Never separate DC connectors under load; unplug the AC side first.
-
Route the cables safely. Use only the supplied cables and follow the manufacturer’s routing instructions; the specification lets DC cables be brought indoors with connectors fitted as the instructions describe. Do not trap a cable in a door or window, run it under carpets or across sharp edges, as the London Fire Brigade advises.
-
Plug straight into the wall socket. No extension lead or adaptor. Fix the supplied label at your consumer unit.
-
Notify your network operator. Follow the instructions on the kit; see telling your DNO.
Fire safety and neighbours
The specification makes users responsible for keeping escape and rescue routes clear, for not increasing the risk of fire spreading along external walls or balconies to neighbouring homes, and for not fixing panels to walls or parts of the building that form a boundary between dwellings. The London Fire Brigade adds that panels and equipment should not go on shared balconies, walkways, windows or escape routes, and that installation should wait until any planned cladding or remediation work is finished.
On a balcony that is your fire escape, or that a neighbour’s escape route passes, a floor stand or an inward-facing panel may block the way. Keep the door, the route and any drainage clear.
Maintenance and storms
The specification requires manufacturers to give recommended intervals for inspecting fixings, cables and connectors. A practical routine:
- After installation: recheck every clamp after the first windy week.
- Twice a year and after storms: look for movement, loosened bolts, cracked clamps, rust and cable chafing.
- Cleaning: water and a soft brush from the balcony floor. Do not lean over the railing.
- Warning signs: rattling, a panel that has shifted, or damage. Unplug and fix it before the next gale.
Common mistakes
- Cable ties, straps or bungee cords as the fixing. Not permitted, and the first gale tests them.
- Mixing brackets from another brand. The structural analysis covers the supplied system only.
- Ignoring the height limit. A mount approved for a low balcony may not be approved for a high one.
- Overtightening on aluminium or thin-walled rails. Follow the torque values; crushed rails lose strength.
- Fitting alone. A 22 kg panel caught by a gust over a railing is dangerous to you and to anyone below.
For how to choose a kit whose mount suits your space, see how to choose a plug-in solar kit; for the electrical side, is plug-in solar safe.
Next steps
Frequently asked questions
How do you mount a plug-in solar panel on a balcony railing?
With the brackets supplied in the kit, fitted to the railing type and height the instructions allow. Assemble the brackets on the panel first, lift it into place with a second person, clamp it to the top rail and a lower rail, tighten to the stated torque, then connect the cables with the plug out.
Can I use cable ties to fix a solar panel to my balcony?
No. The government's product specification does not permit mounting that relies solely on cable ties, rope, string, adhesive tape, bungee cords or straps. A panel of over 20 kg acts like a sail in wind, and only a mount designed and calculated for UK wind loads is acceptable.
Can I mount plug-in solar on a glass balcony?
Only if the manufacturer's instructions list that balustrade type as a permitted mounting. Most railing clamps are designed for metal top rails and bars, and glass panels should never be drilled or clamped without the balustrade maker's approval. Ask the building owner if in doubt.
Can I mount plug-in solar on a wooden balcony?
No. The specification bans installation on timber balconies and timber cladding, and England's permitted development rules exclude plug-in solar on wooden walls, balconies and enclosures. The restriction is there to limit fire spread.
Should the panel go inside or outside the balcony railing?
Outside catches more sun and keeps the balcony usable, but it adds wind exposure and the risk of dropping parts during fitting, and in England it counts towards the permitted projection from the balcony. Inside is easier to reach and maintain. Follow the positions the mounting instructions allow.
How heavy is a balcony solar panel?
A standard glass panel of around 450 W weighs roughly 20 to 25 kg, so two panels add about 50 kg to a railing before wind load. Lightweight panels exist for weaker railings, usually at a higher price per watt.
Sources
- Plug-in Solar Device Interim Product Specification, version 2.0, July 2026, sections 5.5 and 8.3.2
- Town and Country Planning (General Permitted Development) (England) (Amendment) Order 2026 (SI 2026/896)
- Plug-in solar panels: safety advice for residents and homeowners
- Plug-in solar: government response (July 2026)
- Explanatory Memorandum to SI 2026/896
This guide is general information, not legal, tax or electrical advice. Your utility, state and local code have the final say.